
Introduction
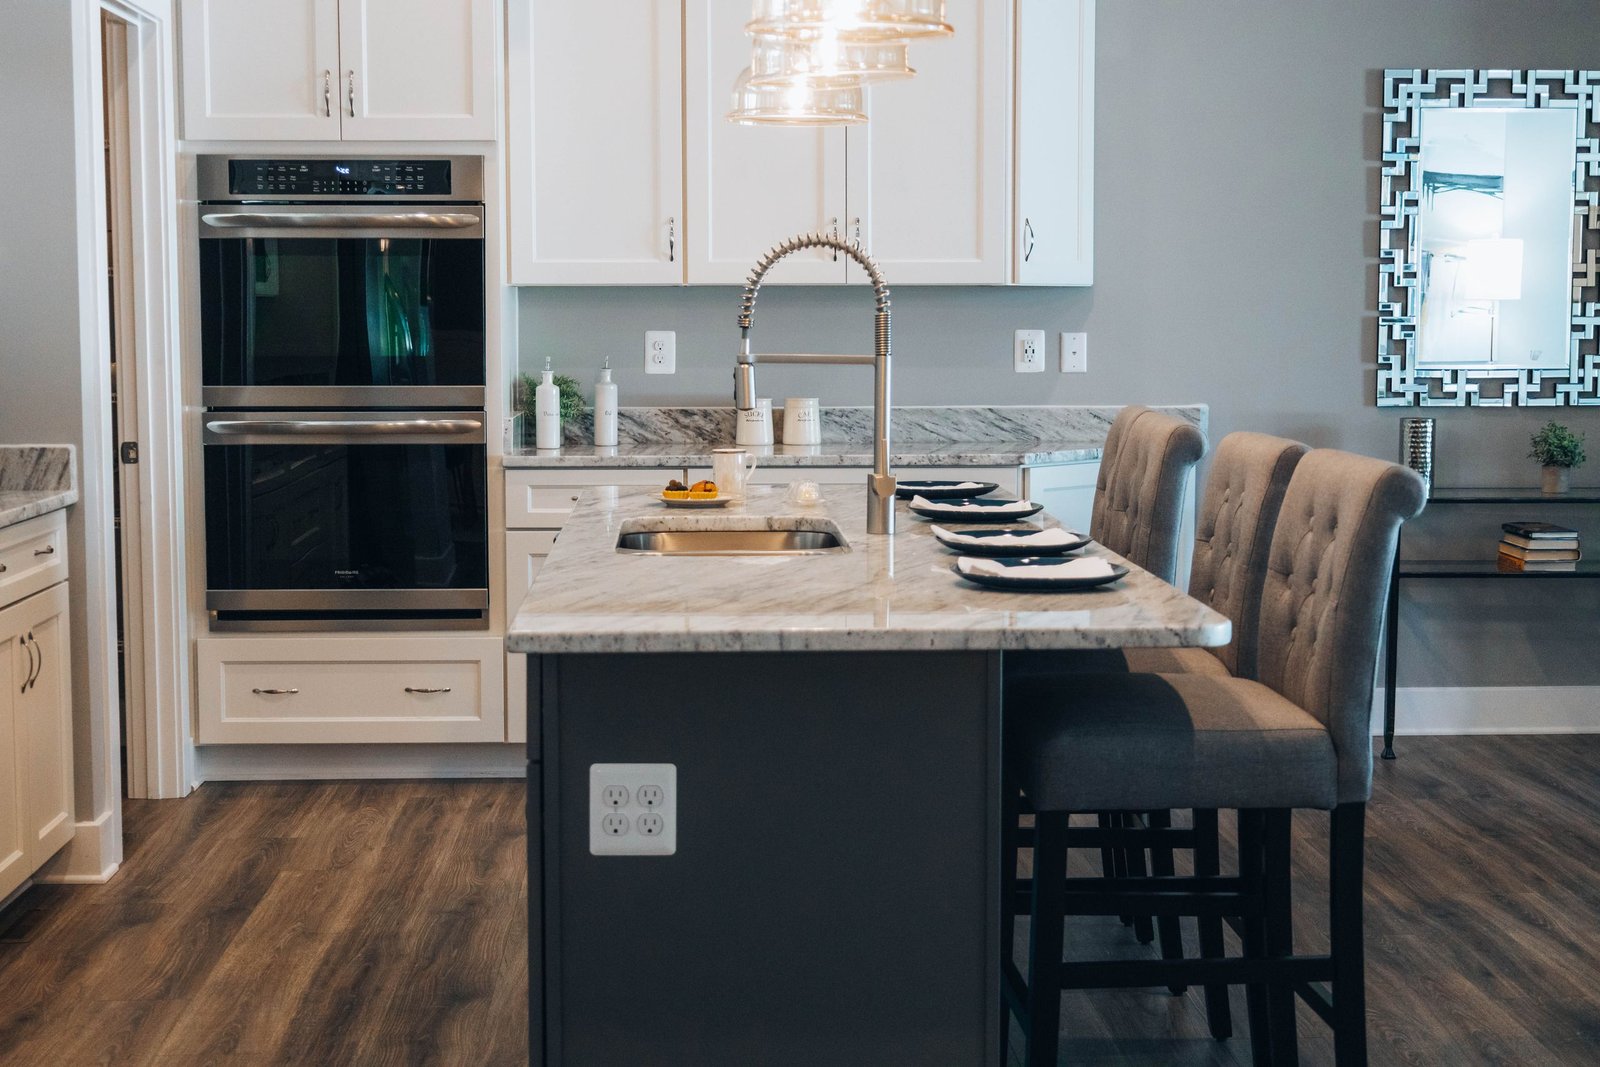
Picture a Tuesday morning. Someone is pouring cereal, someone else is finishing homework, and you’re trying to make coffee without stepping on anyone. A well-planned kitchen island with seating turns that chaos into something that actually works. Everyone has a spot, and nobody is in your way.
This guide shows you how to plan a kitchen island with seating, with ideas for every kind of home, from a studio apartment to a big family kitchen. Unlike most lists, Kitchen Island With Seating we start with the numbers that make seating comfortable (height, overhang, clearance), then show the ideas, then cover lighting, stools, costs, and safety. Skip to the part you need.
Kitchen Island With Seating: The Numbers That Matter
- Space per person: 24 inches of island length (26 to 30 if you want elbow room)
- Seating overhang (knee space): 10 to 15 inches. Many people think this is 42 to 48 inches, but that’s far too deep and would just be a table.
- Counter height island: 36 inches high, with stools that have a 24 to 26 inch seat height
- Bar height island: 42 inches high, with stools that have a 28 to 30 inch seat height
- Gap between seat and countertop: 9 to 12 inches
- Walkway around the island: at least 36 inches, ideally 42 to 48 inches where people work or pass
Keep this list handy. It prevents the most common (and most expensive) planning mistakes.
How Much Space Do You Need for a Kitchen Island With Seating?
Before you fall in love with a design, measure your kitchen. Clearance is the most overlooked part of island planning.
Walkways: Leave 36 inches at an absolute minimum between the island and any counter or wall. If two people cook at once, or the dishwasher and oven doors open into that space, aim for 42 to 48 inches. Remember that a person sitting on a stool needs extra room behind them, Kitchen Island With Seating so add another 12 inches or so on the seating side.
Seats per island: Multiply the number of seats by 24 inches. Two seats need about 48 inches, three need about 72, and four need about 96. Kitchen Island With Seating If your island is shorter than the seating you want, consider seating on two sides (an L-shape) or a table-height extension.
Overhang: For regular counter seating, 12 inches is the standard, and 15 inches is more comfortable for taller people. Less than 10 inches and your knees will hit the cabinet. If your countertop is stone, overhangs beyond 10 to 12 inches may need support brackets or corbels, so ask your installer.
A simple test: Mark the island’s footprint on your floor with painter’s tape. Kitchen Island With Seating Walk around it with a laundry basket, then pull out a chair and sit. If it feels tight on tape, it will feel tighter in real life.
Counter Height vs. Bar Height for a Kitchen Island With Seating
Counter height (36 inches) is the most flexible choice. Stools are easier to climb onto, kids can use it for homework, and the island blends with your other counters. Bar height (42 inches) gives you a visual divider that hides kitchen mess from the living room, but the stools are taller and harder for children and older adults.
If you’re unsure, go with counter height. A third option is table height (30 inches), which uses regular dining chairs and is the best choice for kids, grandparents, and anyone who finds stools uncomfortable.
18 Kitchen Island With Seating Ideas
Small Kitchen Island With Seating (Studios, Apartments, Narrow Kitchens)
1. The slim island with two stools
A narrow island about 24 to 30 inches deep, with two stools tucked at one end, fits where a full island won’t. Choose backless stools so they slide fully under and free up the walkway.
2. The peninsula
If a freestanding island won’t fit, attach one to a wall or counter. A peninsula saves clearance because you only need a walkway on one side. It also gives you seating for two to three people.
3. The drop-leaf island
A rolling cart with a fold-up leaf works as prep space when closed and as seating for two when open. It’s a great option for apartments and rentals.
4. The wall-mounted bar counter
Technically not an island, but a wall-mounted shelf with two stools can be a perfect alternative when floor space is tight. Add a pendant or a small lamp above it.
5. The island with a pull-out table
A cabinet with a slide-out wooden surface gives you extra seating for guests, then disappears into the island when you’re done. Look for sturdy hardware, as cheap slides can sag.
Budget, DIY, and Rental-Friendly Ideas
6. Repurposed table or dresser
An old dresser or console table, topped with butcher block or a sealed wood slab, makes a charming island with built-in storage. Lift the top onto the base with an overhang and add brackets for support. Typical DIY cost: roughly $150 to $500, depending on materials.
7. Kitchen cart plus bench
A $150 to $400 cart paired with a slim bench gives you flexible seating that tucks away. Benches are also great for kids since there are no tipping stools.
8. The rental-friendly rolling island
Choose one with locking wheels and a solid top. You can take it with you when you move, and you won’t need to touch the plumbing or flooring.
9. The painted-base island
A fresh coat of cabinet-grade paint on a plain base instantly makes a cheap island feel custom. Pair it with a butcher block top and bar stools you love.
Family-Sized Islands (Medium Kitchens)
10. The classic one-sided counter
Four stools on one side of a 96-inch island is the family favorite. Everyone faces the cook, kids can do homework in sight, and cleanup is easy.
11. The two-tier island
A raised bar on one side hides dirty dishes from guests, while the lower side stays a clear prep zone. The lower level can also be a good spot for kids to sit.
12. The L-shaped island
Adding seating around a corner puts people face to face and makes conversation easier. Allow at least 24 inches on the long side and 24 inches on the short side for each seat.
13. The island with banquette seating
A built-in bench along one side feels like a cozy diner booth. It works especially well in kitchens that double as the dining room. Add storage under the seat for extra capacity.
14. Island with attached dining table
A table-height extension on one end gives you a flexible spot for meals and homework. Use regular chairs here, and keep them 12 inches shorter than the island so everything stays tidy.
Large Kitchen Islands (Open-Plan Homes)
15. The waterfall island
The countertop flows down the sides to the floor. It’s a striking look and the extra stone on the ends protects the cabinets from scuffs. Expect a higher price tag due to extra stone and labor.
16. Double islands
Two islands, one for cooking and one for seating, create a natural zone separation. Leave 42 to 48 inches between them so people can pass without bumping elbows.
17. The U-shaped island
Seating on three sides is ideal for parties, though it needs a large kitchen. Plan for at least 10 by 14 feet in total space so it doesn’t feel cramped.
18. The farmhouse-style island
A chunky base, open shelving at the ends, and woven or wooden stools fit rustic and traditional kitchens. Make sure the legs or panels don’t block knee space.
How to Design a Morning-Friendly Island
If your island needs to survive a school-morning rush, a few small choices make a big difference:
- Place the seating opposite the cooking zone so spills and splatters stay away from kids.
- Add a charging drawer or outlet nearby. If your island has no outlets, ask an electrician about adding one, as local code often requires at least one on islands above a certain size.
- Put cereal bowls, cups, and lunch containers in the island drawers closest to the seating.
- Keep a small basket on the end for backpacks and mail, so the counter stays free.
Island Lighting That Looks Good and Works
Lighting is the finishing touch that makes an island feel designed. A few simple rules:
- Hang pendants 30 to 36 inches above the countertop so they light the surface without blocking sightlines.
- Space them about 24 to 30 inches apart, and keep the end pendants at least 6 inches from the island’s edge.
- For a long island, use an odd number of pendants (three looks balanced), or a single linear fixture.
- Use dimmers. Bright light for prep, soft light for evening drinks.
- Choose bulbs around 2700K to 3000K for a warm, welcoming glow.
How to Choose Kitchen Island Bar Stools
Stools can make or break the comfort of your seating. Here’s what to consider:
Backless vs. with back: Backless stools tuck neatly under the island and save space, but they’re less comfortable for long sits. Stools with backs (or low backs) are better for families and anyone who lingers over coffee.
Material:
- Wood: Warm and durable, but can show scratches.
- Metal: Easy to wipe and very sturdy, but can feel cold.
- Upholstered: Comfortable, but check for wipeable fabric or removable covers.
- Leather or faux leather: Easy to clean and long-lasting, though it can stick to bare legs in summer.
- Woven (rattan or rope): Pretty and light, but harder to clean around kids.
Comfort extras: A footrest bar is essential on any stool taller than 24 inches. A cushion or sheepskin throw can soften a hard seat. Swivel stools are fun, but kids love to spin them, so skip the swivel if you have toddlers.
Size check: Leave about 6 inches between stools so people don’t bump elbows, which is why 24 inches per seat is the baseline.
Making Your Kitchen Island With Seating Safe for Kids and Older Adults
Tall stools are not for everyone. If you have young children or family members with balance or mobility issues:
- Choose counter height over bar height.
- Pick stools with backs and armrests (or use a bench).
- Look for wide, stable bases and non-slip feet.
- Avoid placing stools near the cooking area or the hot stove.
- Consider table-height seating for at least one spot at the island.
- Never leave toddlers alone on a stool at any height.
How Much Does a Kitchen Island With Seating Cost?
Prices vary widely by region, material, and whether you buy or build. These are rough ranges to help you plan. Check local quotes before you commit.
- Rolling cart or small prefabricated island: about $150 to $800
- DIY island from a repurposed dresser or table: about $150 to $600
- Ready-made freestanding island: about $500 to $3,000
- Custom cabinetry island with stone top: about $3,000 to $15,000 or more
- Bar stools: about $60 to $400 each
- Pendant lights: about $50 to $400 each
- Adding electrical outlets: about $150 to $500 or more, depending on the work needed
Tip: If you’re on a tight budget, spend on a strong top and comfortable stools, then upgrade the base or lighting later.
Five Common Kitchen Island With Seating Mistakes (and How to Avoid Them)
- Too little clearance. Aim for at least 36 inches, ideally more.
- Overhang that’s too shallow. If your knees hit the cabinet, you’ll never use the seats.
- Wrong stool height. Measure the gap between seat and counter, which should be 9 to 12 inches.
- Forgetting the walkway behind the stools. People need room to sit down and stand up.
- Ignoring lighting and outlets. Plan them before the island is built, not after.
Frequently Asked Questions
How many stools can fit at a kitchen island?
Plan on 24 inches of island length per stool. A 6-foot island fits three stools comfortably, and an 8-foot island fits four.
What is the best height for a kitchen island with seating?
For most homes, counter height (36 inches) is the best choice. It’s comfortable for adults and kids and works with a wide range of stools. Bar height (42 inches) is better for a taller divider between the kitchen and living area.
Can a small kitchen have a kitchen island with seating?
Yes, if you have at least 36 inches of walkway around it. In tighter spaces, try a peninsula, a drop-leaf cart, or a wall-mounted bar counter.
How deep should the seating overhang be?
Between 10 and 15 inches. Twelve inches is the standard and 15 is better for tall people.
Can I add seating to an existing kitchen island?
Often, yes. You can add an overhang with a new countertop section, build a table-height extension on one end, or attach a bench. Have a professional check the support, especially for stone.
Final Thoughts
A great kitchen island with seating isn’t about the fanciest stone or the trendiest stools. It’s about getting the basics right: enough space to move, seats that fit people, and a layout that suits how you live. Measure first, tape out the footprint, choose stools you’d happily sit in for an hour, and let the style come after. Do that, and your island will be the place everyone ends up, whether it’s a rushed breakfast, a slow Sunday, or a night of homework and conversation.
