
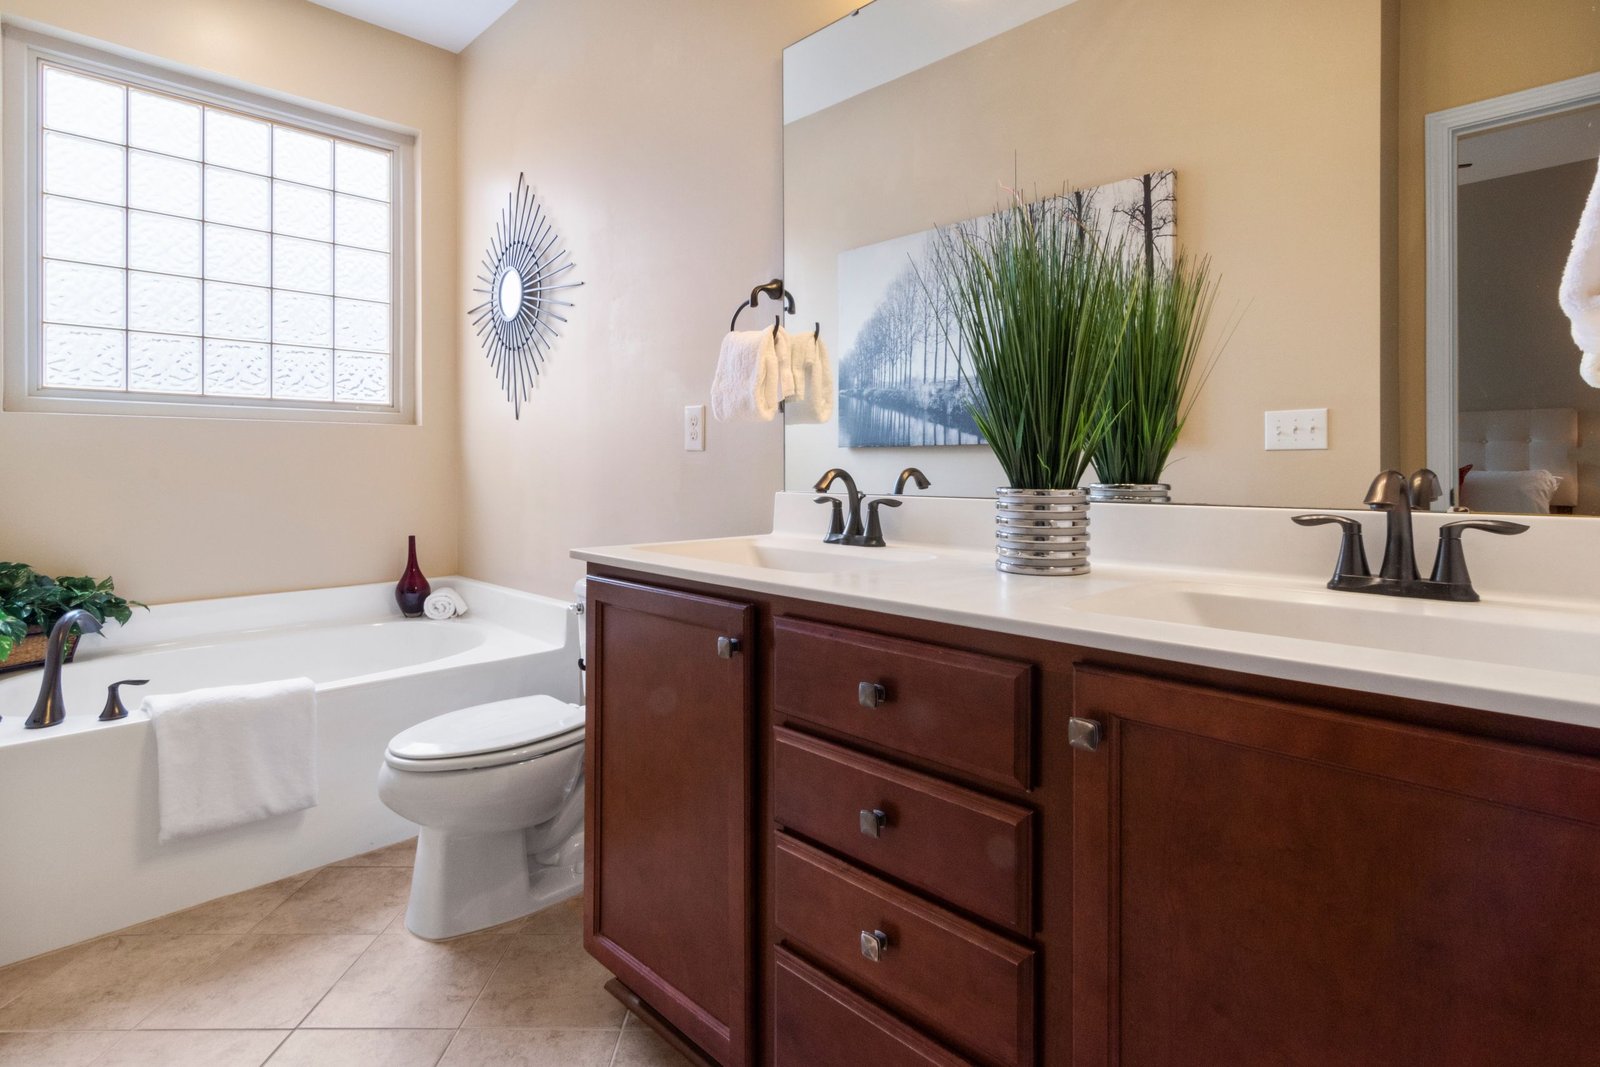
Painting bathroom cabinets can completely change the look of a bathroom without the cost and disruption of replacing the entire vanity. If the existing cabinets are structurally sound but look dated, scratched, stained, or simply no longer fit the room, a fresh coat of cabinet paint can give them a new lease on life.
The catch? The paint itself is only one part of the project.
A smooth, durable result depends heavily on what happens before the first coat goes on. Cleaning, repairing, sanding or scuffing, choosing the right primer, applying thin coats, and allowing enough time for drying and curing all affect how the finished cabinets look and perform.
So, how do you paint bathroom cabinets successfully?
You’ll want to remove the hardware and doors, clean the surfaces thoroughly, repair imperfections, prepare the existing finish, prime where appropriate, apply cabinet-suitable paint in thin coats, and give everything enough time to dry and cure before putting it back together.
Here’s the step-by-step process.
Can You Paint Bathroom Cabinets?
Yes. Most structurally sound bathroom cabinets can be painted, provided the existing material can accept a suitable coating and is properly prepared.
Wood cabinets are generally straightforward to refinish, but painted wood, laminate, engineered wood, and glossy factory finishes may require different preparation. The goal isn’t simply to cover the old color. The new coating needs a clean, stable surface that allows it to adhere properly.
When Painting Makes Sense
Painting is a good option when:
- The cabinet boxes and doors are structurally sound.
- The existing finish is mostly intact.
- You want to update the color without replacing the vanity.
- The cabinet has minor scratches, dents, or cosmetic wear.
- The doors and drawers still function properly.
- There isn’t significant swelling or water damage.
A tired-looking vanity can often benefit from preparation and repainting rather than replacement.
When Replacement Is a Better Choice
Painting won’t fix serious structural problems.
Consider repair or replacement if the cabinet has major water damage, severe swelling, mold problems, badly deteriorated particleboard, loose structural components, or damage that affects how the vanity functions.
Paint can improve appearance, but it can’t restore a substrate that has already lost its structural integrity.
What You’ll Need to Paint Bathroom Cabinets
Gather everything before you begin. Having to stop halfway through because you’re missing primer or sandpaper can make a relatively simple project much more frustrating.
Tools
You may need:
- Screwdriver or drill
- Small paint roller
- High-quality angled brush
- Sanding block or sanding sponge
- Fine-grit and medium-grit sandpaper
- Clean microfiber cloths
- Vacuum or soft brush for dust removal
- Painter’s tape
- Drop cloth or protective sheeting
- Small containers for organizing hardware
Materials
Depending on your cabinet’s condition and material, gather:
- Cabinet-suitable paint
- Appropriate primer
- Mild cleaner or degreaser
- Wood filler or suitable repair compound
- Clean water for compatible water-based products
- Painter’s tape
- Tack cloth or lint-free cloth
Read the instructions for your selected primer and paint before starting. Products can have different requirements for preparation, recoat times, application tools, and curing.
How to Paint Bathroom Cabinets Step by Step
The basic process is straightforward, but don’t rush through the preparation.
1. Prepare the Bathroom and Work Area
Start by clearing the area around the vanity.
Remove toiletries, towels, decorative items, and anything else that could get in the way. Protect the floor and nearby surfaces with a drop cloth or appropriate covering.
Good ventilation is also useful when working with coatings and cleaning products. Since bathrooms naturally experience moisture, it makes sense to choose a time when the room can remain reasonably dry while the paint is drying.
Look — the goal here isn’t to turn your bathroom into a professional paint booth. You simply want a clean, organized space where dust, splashes, and accidental contact won’t interfere with the finish.
2. Remove Doors, Drawers, and Hardware
Remove cabinet doors and drawers whenever practical.
Take off knobs, pulls, hinges, and other removable hardware. Keep screws and hardware organized so everything can be returned to its original location.
A simple trick is to label doors and their corresponding hardware. Even if several doors look identical, this can save time during reassembly.
Painting doors while they’re lying flat also makes it easier to achieve an even finish and reduces the chance of drips.
3. Clean and Degrease the Cabinets
Cleaning is one of the most important steps when learning how to paint bathroom cabinets.
Bathroom vanities can collect soap residue, dust, hair products, skin oils, cleaning-product residue, and other contaminants. If these remain on the surface, primer and paint may struggle to adhere properly.
Clean the cabinet boxes, doors, and drawer fronts using a cleaner appropriate for the existing finish. Pay special attention to areas around handles and frequently touched surfaces.
After cleaning, allow the surfaces to dry completely.
Here’s the thing: paint alone can’t compensate for a dirty surface.
4. Repair Dents, Holes, and Scratches
Inspect every paintable surface after cleaning.
Look for:
- Old screw holes
- Dents
- Deep scratches
- Chipped areas
- Small cracks
- Damaged edges
Use an appropriate filler for minor imperfections, then allow it to dry according to the product directions.
Once dry, sand the repaired areas until they are reasonably smooth and level with the surrounding surface.
You don’t have to make every tiny imperfection disappear. The objective is to create a stable, visually consistent surface for the new coating.
5. Sand or Scuff the Existing Finish
Sanding helps prepare the surface for better adhesion and can also smooth imperfections.
How much sanding you need depends on the cabinet material and existing finish.
For previously finished wood or glossy cabinetry, scuffing the surface can help remove some of the slickness. If the old finish is damaged or uneven, more preparation may be necessary.
Or maybe I should say it this way: you don’t need to sand every cabinet aggressively, but you do need to prepare the surface for good adhesion.
Some bonding primers are designed to work on suitable clean surfaces with less extensive sanding. That doesn’t mean sanding should automatically be skipped. Follow the requirements of the primer and paint system you’re using.
6. Remove Sanding Dust
Never move straight from sanding to painting.
Sanding leaves fine dust behind, and that dust can become trapped in primer or paint. The result may be a rough, gritty surface.
Vacuum or wipe the surfaces carefully using a clean, lint-free cloth appropriate for the finish and coating system.
Pay attention to corners, grooves, edges, and around screw holes.
Give the surface another visual inspection before moving on.
7. Apply Primer
Primer can help with adhesion, coverage, and creating a suitable base for the finish coats.
The right primer depends on what you’re painting.
A bonding primer may be useful for glossy or challenging surfaces. Other cabinet systems may call for a particular primer designed to work with the selected topcoat.
Benjamin Moore STIX Waterborne Bonding Primer and similar products are examples of primers designed for adhesion on difficult surfaces. Always follow the manufacturer’s preparation and application instructions rather than assuming every primer works the same way.
Apply the primer evenly without leaving heavy buildup around edges and corners.
Allow it to dry according to the product instructions before sanding or applying paint, if sanding between coats is recommended.
8. Apply the First Paint Coat
Now you get to the part most people think of when they hear “paint bathroom cabinets.”
Choose a coating specifically suitable for cabinets or trim rather than automatically reaching for ordinary wall paint.
Apply a thin, even coat.
A small roller can work well on larger flat areas, while an angled brush can help with corners, profiles, and edges. Avoid loading the brush or roller with too much paint.
Heavy coats can create drips, ridges, uneven drying, and visible brush marks.
Thin coats generally give you more control.
9. Let the First Coat Dry
Don’t judge the finish too quickly.
Paint can feel dry on the surface before it has reached the level of hardness needed for regular handling. Drying, recoating, handling, and full curing are not necessarily the same thing.
Follow the manufacturer’s stated recoat time.
If the surface still feels soft, tacky, or easily marked, give it more time rather than immediately adding another coat.
Humidity and temperature can affect how coatings dry, which matters in a bathroom environment.
10. Apply Additional Coats
Most cabinet projects require more than one finish coat.
Apply additional thin coats rather than trying to achieve complete coverage with one heavy application.
Between coats, inspect the surface for:
- Drips
- Runs
- Brush marks
- Dust particles
- Uneven coverage
- Missed edges
If the product instructions recommend light sanding between coats, follow that process and remove the dust before continuing.
The exact number of coats depends on the product, color, surface, primer, and desired coverage.
11. Paint Doors and Drawers Properly
Doors and drawer fronts deserve the same attention as the cabinet boxes.
Lay removable pieces flat on a protected surface when possible. Paint one side according to your planned sequence, allow it to dry appropriately, then turn or reposition the piece when the coating is ready.
Pay close attention to edges and recessed areas.
Don’t flood grooves with paint. Excess coating can collect in corners and create an uneven appearance.
For shaker-style or detailed doors, work methodically so you don’t accidentally leave heavy paint buildup along the profiles.
12. Reassemble the Vanity
Once the paint has dried sufficiently and the coating has had appropriate time to cure, reinstall the hardware, doors, and drawers.
Avoid forcing screws or hardware into freshly painted surfaces if the coating is still soft.
Be gentle during the first several days of use. A finish can be dry enough to handle while still becoming harder and more durable as it cures.
What Is the Best Paint for Bathroom Cabinets?
There’s no single paint that is perfect for every bathroom cabinet.
The better question is: Which cabinet-suitable coating is appropriate for the material, existing finish, and level of use?
Waterborne Alkyd Paint
Waterborne alkyd products are designed to provide characteristics associated with traditional alkyd coatings while offering water-based application and cleanup.
For example, Benjamin Moore ADVANCE Interior Paint is a waterborne alkyd product used for cabinetry and trim.
These coatings can be a strong choice when you want a smooth, durable cabinet finish, but you still need to follow the manufacturer’s drying and curing requirements.
Acrylic or Latex Cabinet Paint
Acrylic or latex-based cabinet paints can be convenient to apply and clean up, depending on the formulation.
The label alone isn’t enough to determine performance. “Latex” covers a broad category of coatings, and cabinet-specific formulations can behave differently from ordinary wall paint.
Look for a product specifically intended for cabinets, doors, trim, or other high-contact surfaces.
Oil-Based Paint
Oil-based coatings have traditionally been used when a hard, durable finish is desired.
However, they can have longer drying times and stronger odors than many modern water-based alternatives.
If you choose an oil-based product, follow its specific ventilation, application, drying, and cleanup instructions.
What Paint Finish Is Best for Bathroom Cabinets?
The finish affects both appearance and practicality.
Satin
Satin provides a softer sheen and can be a good choice if you want a less reflective cabinet surface.
It can also help hide some minor surface imperfections compared with a very glossy finish.
Semi-Gloss
Semi-gloss is a popular option for bathroom cabinetry because it provides more sheen and can be easier to wipe clean.
It can also make surface imperfections more visible, so careful preparation becomes even more important.
Gloss
Gloss offers the highest level of shine among these common options.
It can create a dramatic, polished appearance, but it tends to highlight imperfections in the underlying surface. If your cabinet doors have dents, scratches, or uneven preparation, a glossy coating may make them easier to see.
Do You Need to Sand Bathroom Cabinets Before Painting?
Not every cabinet requires the exact same amount of sanding.
Finished or glossy cabinetry often benefits from sanding or scuffing because the existing surface may not provide ideal adhesion for a new coating.
At the same time, some bonding primers are designed to adhere to certain properly cleaned surfaces with minimal sanding.
I’ve seen conflicting advice about sanding bathroom cabinets. Some guides recommend sanding every surface, while specialty bonding primers can reduce sanding on suitable clean surfaces. The better approach is to evaluate the existing finish and follow the primer manufacturer’s instructions.
If the old surface is peeling, contaminated, damaged, or extremely glossy, don’t assume a quick wipe-down is enough.
Can You Paint Laminate Bathroom Cabinets?
Yes, laminate bathroom cabinets can sometimes be painted, but preparation is especially important.
Laminate isn’t the same as unfinished wood. The surface is usually smooth and nonporous, so ordinary paint may not adhere well without the right preparation.
For laminate cabinets:
- Clean the surface thoroughly.
- Repair damaged areas where appropriate.
- Lightly scuff the surface if recommended.
- Remove all dust.
- Use a compatible bonding primer.
- Apply a cabinet-suitable topcoat.
- Respect all drying and curing times.
If the laminate is peeling extensively or the underlying material is swollen from moisture, painting may not provide a lasting solution.
How to Get a Smooth Finish on Bathroom Cabinets
A smooth finish is less about one magic product and more about controlling every stage of the process.
Apply Thin Coats
Thick coats can sag, drip, and take longer to dry.
Thin, controlled applications generally give you better control over the final appearance.
Use an Appropriate Roller and Brush
A small quality roller can help cover broad, flat surfaces efficiently.
An angled brush can help with edges, corners, and detailed profiles.
Avoid repeatedly brushing an area after the paint has started setting. Excessive brushing can leave visible marks.
Avoid Excessive Humidity
Bathrooms are naturally humid, so ventilation matters.
Give the coating an environment where it can dry according to its manufacturer’s instructions. Excessive moisture can interfere with drying and may contribute to problems with painted surfaces over time.
Don’t Rush Recoat Times
The urge to add another coat quickly is understandable.
Resist it.
If the manufacturer’s instructions say the coating needs a certain amount of time before recoating, allow that time. A project that takes a little longer is preferable to a finish damaged by premature recoating.
Keep Dust Away While Coatings Dry
Dust can settle into wet paint and create a rough texture.
Keep unnecessary activity away from freshly painted components and avoid creating dust nearby while the coating is drying.
Allow Proper Curing Before Heavy Use
Dry doesn’t always mean fully cured.
The coating may continue to harden after it feels dry to the touch. Avoid excessive scrubbing, impacts, or rough handling until the product has had enough time to cure.
Common Bathroom Cabinet Painting Mistakes
Even a straightforward vanity makeover can go wrong when preparation is rushed.
Painting Over Dirt and Grease
Paint needs a clean surface. Residue can interfere with adhesion and contribute to peeling or an uneven finish.
Skipping Surface Preparation
Painting directly over a slick, damaged, or poorly prepared finish is asking the new coating to do too much.
Preparation creates the foundation.
Using Ordinary Wall Paint
Wall paint is formulated for walls. Bathroom cabinets experience repeated touching, opening, closing, cleaning, and moisture exposure.
A cabinet-suitable product is generally a better starting point.
Applying Paint Too Thickly
More paint doesn’t automatically mean better coverage.
Heavy coats can create runs, drips, brush marks, and longer drying times.
Ignoring the Edges
Cabinet edges are easy to overlook, especially on doors and drawer fronts.
Take your time around profiles and corners so the final finish looks consistent from every angle.
Reinstalling Hardware Too Soon
Freshly painted surfaces can be vulnerable to scratches and pressure.
If the coating hasn’t cured sufficiently, installing hardware can damage the finish you’ve just created.
How Long Does It Take to Paint Bathroom Cabinets?
The actual painting can be relatively quick, but the entire project takes longer because of preparation and drying.
A small vanity might require several hours of active work spread across a day or more, while larger vanities, detailed doors, multiple coats, repairs, and longer drying or curing periods can extend the project.
A realistic schedule includes time for:
- Cleaning
- Repairs
- Sanding or scuffing
- Priming
- Drying
- Multiple paint coats
- Final curing
- Reassembly
Don’t build your schedule around how quickly the paint feels dry. Product-specific drying and curing instructions should determine when each stage is ready.
How to Maintain Painted Bathroom Cabinets
Once the makeover is complete, maintenance is fairly simple.
Wipe cabinet surfaces regularly with a soft cloth and a cleaner appropriate for the coating. Avoid harsh scrubbing unless the paint manufacturer specifically says the finish can tolerate it.
Keep standing water away from cabinet edges and exposed seams.
Use bathroom ventilation to help control excess moisture, especially during and after showers.
If you notice a small chip or scratch, address it before moisture or repeated use makes the damage worse.
A little maintenance can help preserve the finish and keep the vanity looking fresh for longer.
FAQs About Painting Bathroom Cabinets
Can I paint bathroom cabinets without sanding?
Sometimes. Certain bonding primers are designed for properly cleaned surfaces with minimal sanding. However, glossy, damaged, contaminated, or difficult surfaces may need more preparation. Check the requirements of your selected primer and paint system.
What kind of paint should I use on bathroom cabinets?
Choose a cabinet- or trim-suitable coating designed for durability and regular cleaning. Waterborne alkyd, acrylic cabinet paint, and other specialized cabinet coatings can be suitable depending on the product and existing surface.
Do I need primer before painting bathroom cabinets?
Primer can improve adhesion and coverage, particularly on difficult or previously finished surfaces. The right choice depends on the existing material and selected topcoat.
How many coats of paint do bathroom cabinets need?
The number varies by product, color, primer, and surface. Two thin finish coats are common, but follow the paint manufacturer’s instructions rather than relying on a fixed number.
How long should bathroom cabinets dry before reinstalling?
Follow the coating manufacturer’s instructions. Dry-to-touch time isn’t necessarily the same as the time required for safe handling or full curing.
Can I paint laminate bathroom cabinets?
Yes, laminate cabinets can be painted when the surface is properly cleaned, prepared, primed with a compatible bonding primer, and coated with an appropriate cabinet paint. Damaged or swollen laminate may require replacement rather than repainting.
Should I paint the inside of bathroom cabinets?
You can, but it’s optional. Painting the interior can create a more finished appearance, while leaving it unpainted can reduce the amount of work. Consider how the space is used and whether the existing interior is in good condition.
Can I paint bathroom cabinets white?
Absolutely. White is a common cabinet color and can create a clean, bright appearance. The key is still proper preparation and choosing a coating that can handle regular bathroom use.
How do I prevent brush marks?
Use an appropriate high-quality brush, avoid overloading it, apply thin coats, and don’t repeatedly brush paint after it begins to set. A suitable small roller can also help create a more uniform appearance on flat surfaces.
Is painting bathroom cabinets cheaper than replacing them?
Painting can be less expensive than replacing a structurally sound vanity because you are updating the existing cabinet rather than purchasing an entirely new one. Your final cost depends on the paint, primer, tools, hardware, repairs, and size of the project.
Voice Search and Quick Answers
What’s the best way to paint bathroom cabinets?
Clean and prepare the cabinets thoroughly, remove the doors and hardware, repair imperfections, sand or scuff as appropriate, apply compatible primer, use cabinet-suitable paint in thin coats, allow adequate drying and curing, and then reassemble.
How do I paint bathroom cabinets without brush marks?
Use thin coats, an appropriate brush and roller, and avoid overworking the paint. Good surface preparation and following the product’s application instructions are just as important as the tool you use.
Should I sand bathroom cabinets before painting?
Sanding or scuffing is often useful for finished or glossy cabinets, but the exact amount depends on the surface and coating system. Some bonding primers can reduce extensive sanding on suitable surfaces.
Why does bathroom cabinet paint peel?
Peeling can result from poor cleaning, inadequate surface preparation, incompatible primer or paint, moisture problems, or handling the coating before it has adequately dried or cured.
When should I reinstall painted bathroom cabinet doors?
Reinstall them only after the coating has dried enough for safe handling and according to the manufacturer’s instructions. Remember that a coating may continue curing after it feels dry.
Final Thoughts
Learning how to paint bathroom cabinets doesn’t require professional-level painting skills, but it does require patience.
The biggest mistake is treating the project as a simple color change. The color is the visible part, but the quality of the finished vanity depends heavily on what happens underneath it.
Clean the cabinets properly. Repair the damage. Prepare the existing finish. Use the right primer when needed. Choose a cabinet-suitable coating. Apply thin coats. Give each stage enough time to dry and cure.
If your existing bathroom cabinets are structurally sound, a careful repaint can be a practical way to refresh the space without replacing the entire vanity.
The best results come from slowing down where it matters and resisting the temptation to rush the finish.

1 Comment
Pingback: How to Paint a Room: A Beginner’s Guide to a Smooth, Professional-Looking Finish